Finding the Story in Sound
In our Com 561 Multimedia Content Creation class in the Spring of 2024, we were tasked with creating an original audio file. Our project goal was straightforward in theory but challenging in execution: record an interview, edit it into an engaging two-minute story, and enhance it with descriptive sounds. This was my first venture into the world of audio recording and editing using Adobe Audition. Before this project, I had never attempted audio editing, and I quickly discovered that it is both incredibly fun and incredibly time-consuming.
As I soon learned, turning a 20-minute interview into two minutes of cohesive storytelling requires far more than technical skill. It demands precision, patience, and a deep understanding of narrative flow. This reflection outlines the steps, tools, challenges, and lessons I encountered while developing my audio story on the Great Allegheny Passage, one of America’s most scenic rail trails.

Step One – Topic Decision and Research
Before recording began, I needed a compelling topic and subject. I have a personal interest in rail trails, as I had planned to complete my first one in Kelowna, British Columbia the following summer. That interest guided my topic choice: an interview about cycling the Great Allegheny Passage (GAP), a 150-mile rail trail stretching from Pittsburgh, Pennsylvania, to Cumberland, Maryland.
I met someone who had completed this route and agreed to share his experience. Before the interview, I conducted background research on the trail, including its history, geography, and cultural significance, in order to design thoughtful questions that could lead to rich, story-driven responses. Research served as an important pre-production step, aligning with the other principles of qualitative interviewing of open-ended questions, active listening, and flexible follow-ups that allow the story to unfold naturally.
Step Two – Space and Equipment
High-quality audio begins long before editing with the environment and equipment. I found the smallest, quietest room available and turned off all appliances to minimize background noise. Several short test recordings helped me measure room acoustics and microphone placement.
For recording, I used my iPhone’s native Voice Memo app paired with wireless Lavalier Bluetooth microphones that connect via a Lightning port. These microphones include noise-cancellation technology, which was invaluable in maintaining clarity and focus on the speaker’s voice.
Once the interview was complete, I AirDropped the file to my Mac for post-production. Even at this stage, the process was iterative with testing, restarting, and refining to capture clean, usable audio. This step reinforced a key production principle: sound quality cannot be “fixed” later as easily as it can be recorded correctly at the start.
Step Three – Editing and Building the Story
With the raw file in hand, the fun, and the challenge, truly began. In the weeks prior, I had completed several small Audition exercises to learn the basics of waveform editing, multitrack mixing, and noise reduction. Now, it was time to apply those skills to a real project.
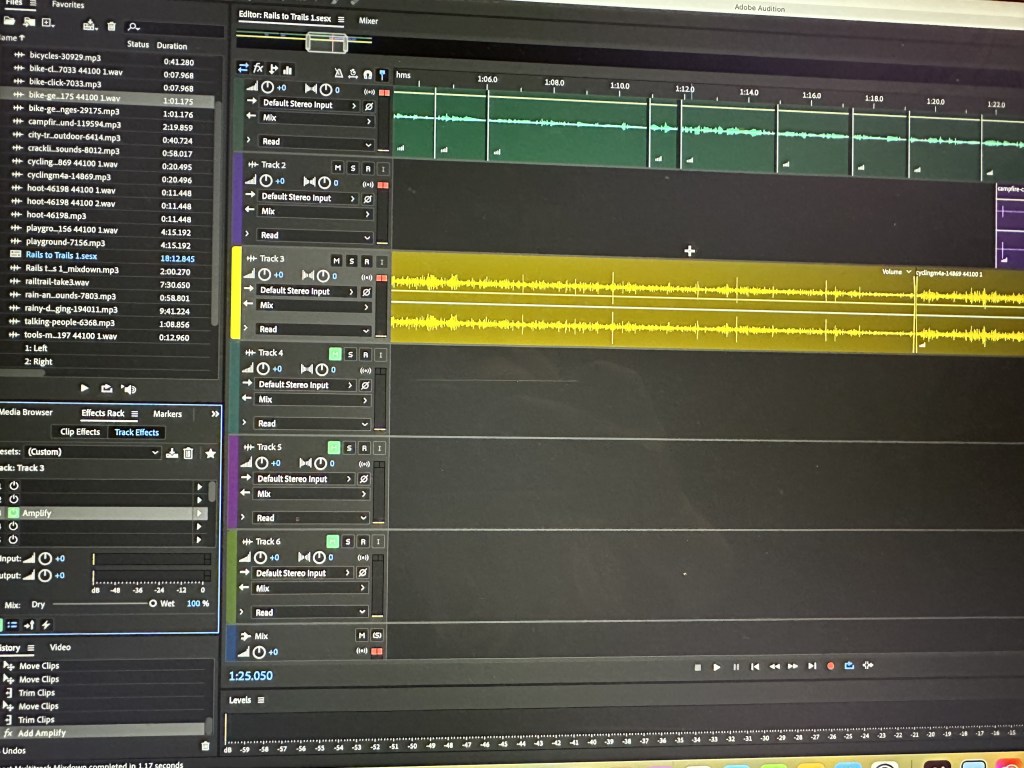
I imported the interview into Adobe Audition, listened several times, and began identifying sections that best conveyed the narrative. I noted moments where I could later insert ambient sound to evoke place and emotion, such as birds, bike tires on gravel, and rustling leaves. I sourced these royalty-free audio clips from Pixabay.com and layered them beneath the main dialogue.
The majority of my editing time, nearly three hours, was spent cutting down the story. Reducing 20 minutes of conversation to two minutes required difficult decisions about pacing and content. I removed tangents, “ums” and “uhs,” and filler words while striving to preserve the natural rhythm of the speaker’s storytelling.
One challenge I didn’t anticipate was speech tempo. My interviewee spoke slowly, which helped with clean splicing but limited the total amount of usable content under the two-minute cap. In hindsight, I would have asked certain questions twice or gently prompted shorter responses to provide more editing flexibility.
After finalizing the dialogue, I added environmental audio and music. Through experimentation, I learned the importance of sequence, such as finalizing the voice track before adding background sound, to avoid redundant adjustments. Using Track Effects > Amplitude & Compression > Amplify, I balanced voice levels and ensured that background audio supported, rather than overpowered, the narration.
Step Four – The Final Product
After numerous exports and revisions, I reached a version where voice and ambient sounds achieved balance and flow. I exported the final mix as an .mp4 file, created an account on SoundCloud, and uploaded my finished two-minute audio story for streaming.
The result was a piece that blended interview journalism, sound design, and storytelling to transport listeners to the Great Allegheny Passage through both words and soundscapes. The process deepened my respect for professional audio editors, who must balance creative storytelling with technical precision.
Lessons Learned
This project offered several insights that extend beyond technical proficiency. Editing is narrative construction with each decision about what to cut or keep shaping the meaning of the story. Editing is less about removal and more about intentional storytelling. I also learned how much sound conveys emotion. The right ambient sound can make a listener feel present in the scene. A soft wind or crunch of gravel provides sensory texture that words alone cannot. I honestly had never really consciously listened for background sounds before this assignment. Planning really does matter. Researching your topic, preparing questions, and understanding pacing are as crucial as editing skills. Every minute saved in pre-production saves hours later. Audio storytelling involves listening deeply to both the subject and the sound. It’s an act of translation between experience and emotion.
Challenges
A few key challenges that stood out were time compression. Distilling 20 minutes of dialogue into two coherent minutes was the hardest creative task. There was a technical learning curve with Adobe Audition, which is a powerful but complex tool to master. Also, voice dynamics were something I did not appreciate before recording. My subject’s shifting tone and volume required additional processing to maintain consistent loudness.
Despite these hurdles, the final outcome was worth every minute. The process taught me how to transform raw conversation into a purposeful narrative, and how to “find the story” inside the sound.
The Value of Audio Storytelling
From a strategic communication perspective, this exercise demonstrated the enduring power of audio as a storytelling medium. Unlike visual media, audio encourages imagination and emotional participation. It invites listeners to co-create the scene in their minds, fostering empathy and retention. Producing this piece also revealed how sound design aligns with the concept that “the medium is the message.” The auditory form itself shaped how the story was experienced: personal, reflective, and immersive. In an age dominated by visual media, the return to sound reminded me that simplicity can be powerful.
On a personal level, I gained confidence in both creative and technical abilities. Audio editing challenged me to combine curiosity with craftsmanship, to merge research, emotion, and precision into a single medium. Looking back, this project was a study in both communication and patience. Each step, from topic selection to final export, taught me how stories evolve through the process. What began as an interview became a layered experience of listening, learning, and iterating. Above all, this experience reinforced that great storytelling, whether visual, written, or auditory, begins with listening.
Thank you for your response. ✨

